

Recently, we have received reports from customers that a virus is infecting their L3+ control board. It is understood that the control board infected by the virus will not be able to refresh the firmware through the web interface, nor can it refresh the firmware through the SD card. How to easily and quickly remove the virus on the Antminer L3+ control board?
I. Tools required
1. Micro SD card (16 GB or less)
2. Electric soldering iron and solder.
3. Insulated copper wire to use as a jumper wire.
4. Resistors. (Any between 1k-10k should do just fine)
5. PC program. You need to use the PC program to restore the firmware and flash the SD card.
II. Attaching the jumper wire

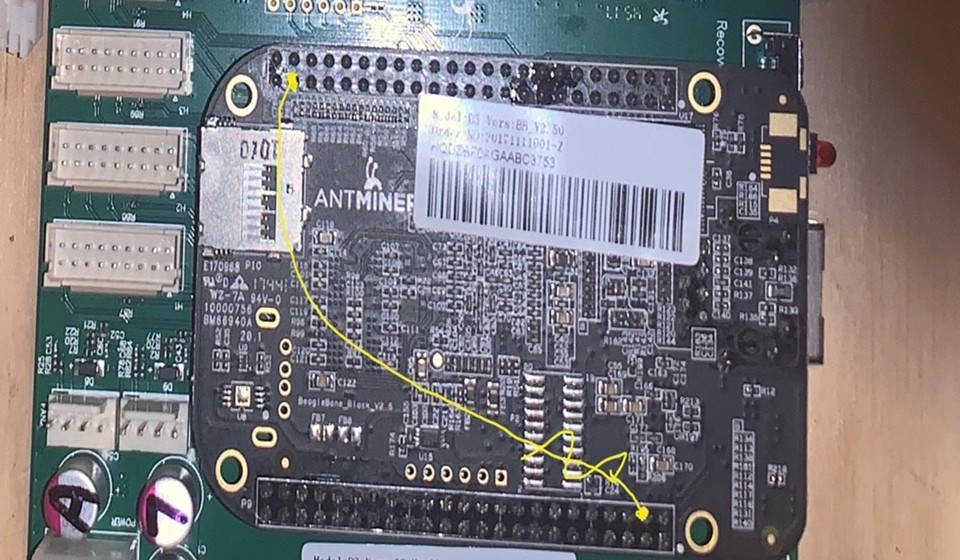
1. Review the diagram above. You will attach an end of the jumper wire to each of the specified pins on the BB board by soldering them on.
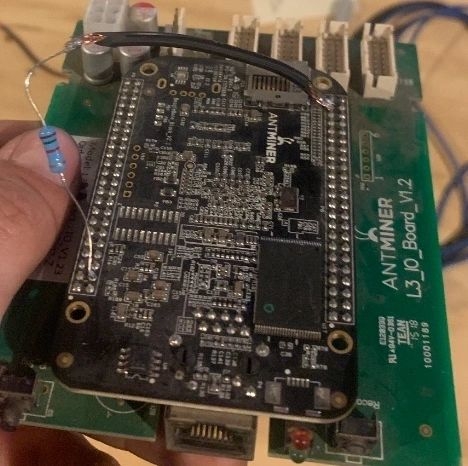
2. Review the image below, which shows the direction the resistor should be facing.

3. Welding resistance and jumper wires.
4. Solder jumper wire to proper pins on BB board.
5. Make sure that there is nothing in contact with anything it shouldn’t be. That there is no loose solder in contact to adjacent pins with the BB board.
III. Use PC program to flash SD card
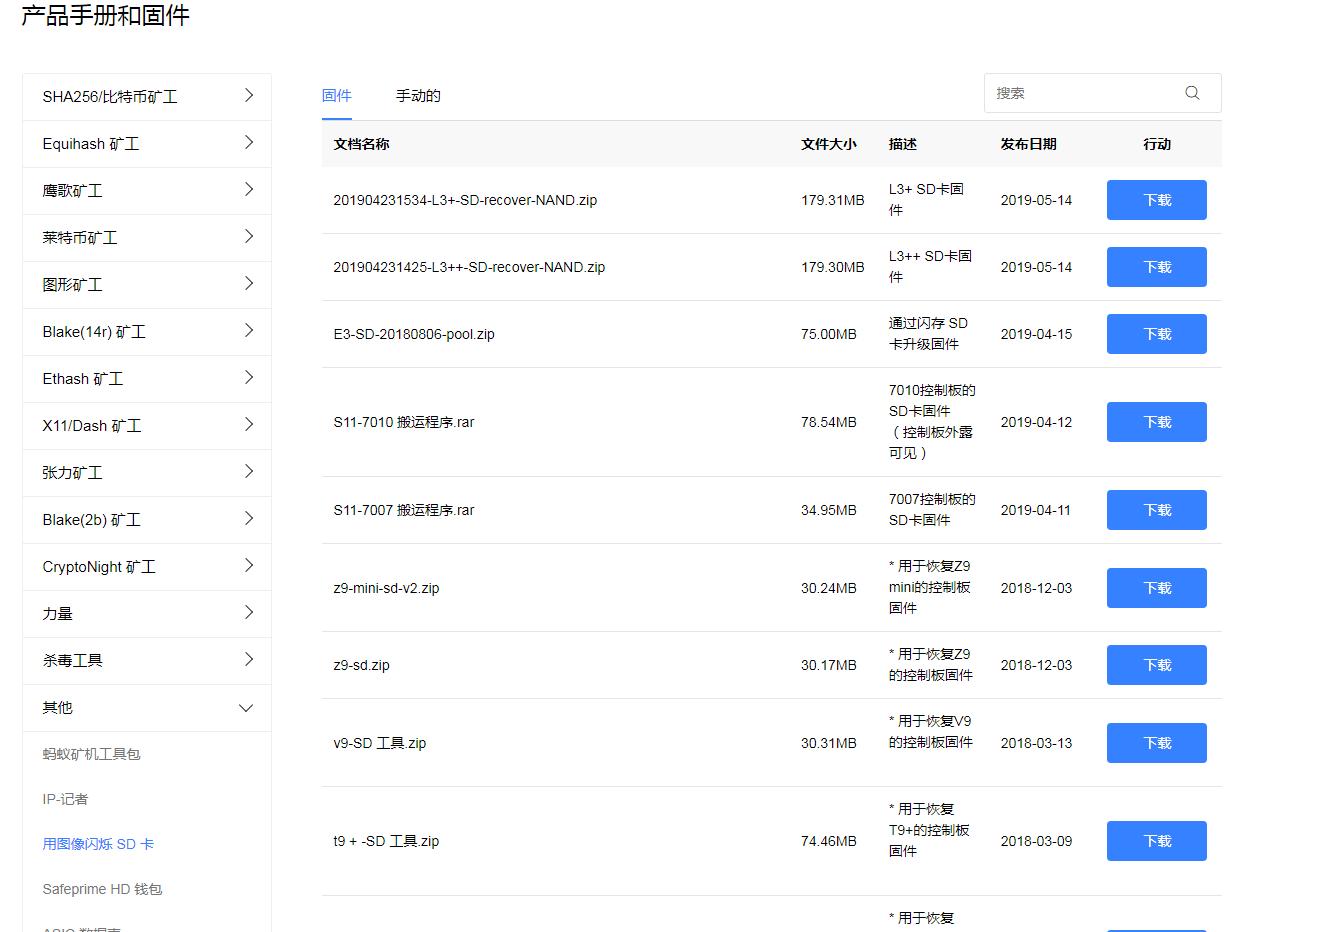
1. Download the SD card recovery firmware to your PC. It is a disk image file. You can find it here:
It is the file at the very top of the page named: 201904231534-L3+-SD-recover-NAND.zip

2. Format your SD card (Fat32).
3. Open the PC program and select your SD card from the device list. Load the file into the program and press flash. This will take about 20-30 minutes to complete.
IV. Flashing the control board
1. Insert the SD card with the recovery firmware in the SD card slot of the control board.
2. If you do not have a way to elevate the control board so that the bottom of the board is not in contact with anything, just slide the control board back into the miner frame. Placing the control board on a surface can cause the board to get shorted out. Especially if it’s a metal surface.
3. Plug just the control board into a power supply and power it up.
4. In about a minute, you should see blinking green/red lights on the back of the control board.
5. Close the control board completely. Unplug the power supply, and unplug the PCIE cable from the control board itself. This is to ensure that the power supply isn’t still sending any stored power to the board.
6. After the control board is completely powered off, remove the microSD card.
7. Remove the jumper wire/resistor.
V. Reflashing to L3+ firmware
Regarding the L3+ SD card refresh guide, the operation is as follows:
1) Please download the SD card zip file from the website:
Please make sure to download an SD-card image and not a firmware installation file. All SD-card images are ZIP files.
2) Format an SD card with the FAT32 file system.
3) Extract the content of the ZIP file to an SD card. The content of the ZIP file should be extracted to the root of the SD card drive.
4) Insert the Micro SD card into the card reader on the Antminer. Then, start the miner and wait a few minutes. When the two LED lights (green and red) are blinking simultaneously, the process is completed.
5) Power off the miner and remove the SD card.
6) Power on the miner again, and it will now have the firmware installed. Please proceed with the firmware configuration.
VII. Testing
1. Close the control board completely and remove the SD card.
2. Plug in the network cable and power on the control board again.
3. Find IP address.
4. Get into the web interface.
5. Go to >System >Upgrade >Browse >Upload the firmware file of your choosing >Flash Firmware image.
If you get "System upgrade succeeded", it worked, and your job is complete. Sometimes you will get a "network error." In that case, try again 5 minutes later, and it should work. If you get "signature verification failed," then it didn't work. But if you followed these steps correctly, it should fix it.
The content and pictures of this article are from the Internet, compiled and edited by ZEUS MINING.